1. Select the Plans tab from the top navigation bar.

2. Click on the 'Create New Plan' button and a popup will appear for you to fill out.

3. Create a name for the plan that is specific and includes the location name.
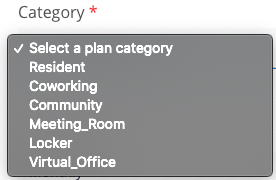
4. Choose a Category for your plan ie. Coworking or Resident Desk
5. Fill in the standard rate, frequency of billing and meeting room credits included
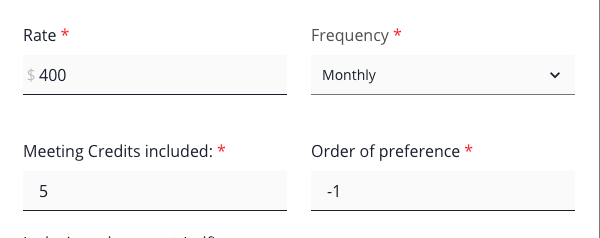
NOTE: Meeting room credits are allocated monthly and do not accumulate.
NOTE: The standard rate of a plan will be shown on your signup page if this plan is visible for online signups. Individual rates for members can be changed manually as required.
6. You have the option to include a PDF document to the plan to detail what the plan includes or any additional information you would like. This will be shown on your online signups page if the plan is made visible for online signups.

7. Select the toggle to make the plan an Add On Plan. This means that this plan is an additional plan to add to a team account and isn't allocated a seat. For more information on the difference between standard plans and Add On Plans see this article here.

NOTE: The toggle for 'show to members' will determine if the plan can be seen on your online signups page. The toggle for 'show to admin' will determine if your workspace admins can add this plan to member team accounts on not. When you no longer use a particular plan you should hide it for admins to avoid them using it.
All done! Now you can create Add On Plans for any additional products or services you wish to charge recurringly to your members such as lockers, parking spaces or additional meeting room credit.